Rule configurations
Configuring a new rule in the platform is done by going to the ‘Rules & Algorithms’ page and clicking on the ‘+ Create Rule’ button on the top right:
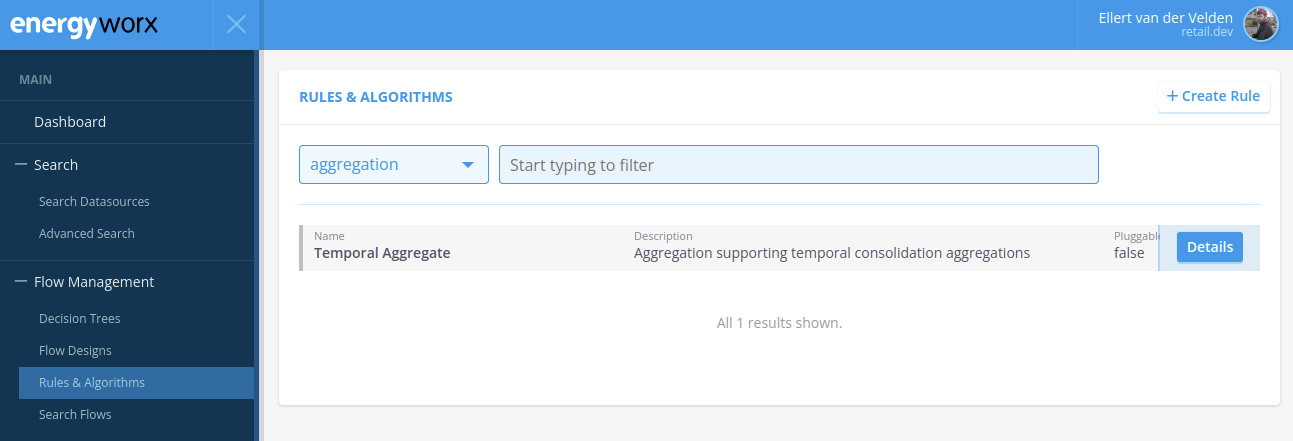 Rules & Algorithms section in the Energyworx platform
This will open a new screen that looks like the following:
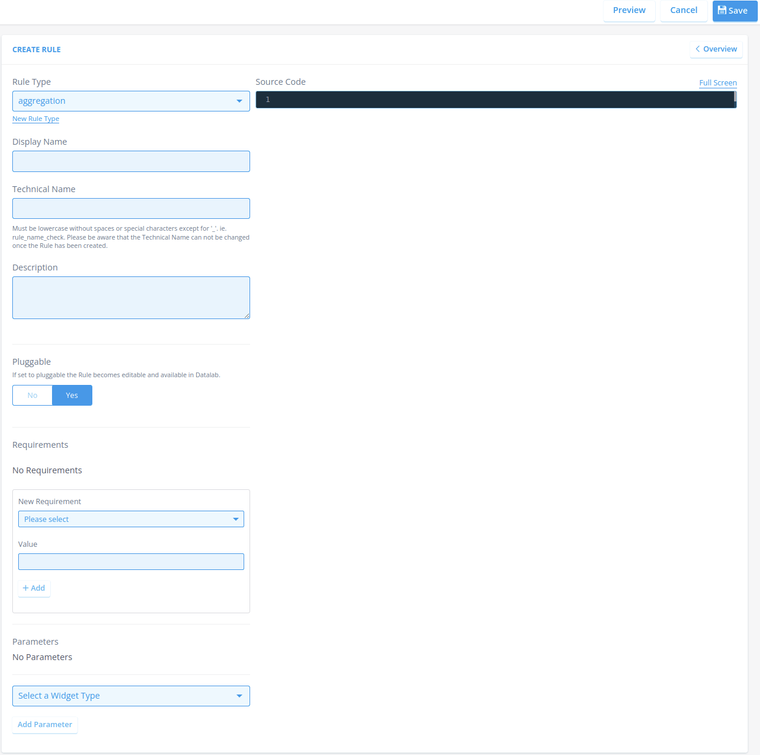 New rule configuration
Let’s go over each of the fields in this screen and what they are used for.
- Rule Type: The type of rule that we are creating. A new rule type can be introduced if required with the ‘New Rule Type’ button. The only hard requirement is that transform rules MUST have the rule type ‘transform’ (and non-transform rules should NOT), as otherwise they cannot be used properly within transformation configurations.
- Display Name: The name of the rule as it will appear on the ‘Rules & Algorithms’ page as well as within flows. It is recommended to name the rule something easy to interpret.
- Technical Name: The name of the rule used internally in the platform for identification purposes. It must always be in lowercase without any spaces or special characters except
_(for instancerule_name_check), conforming to the same restrictions as function names in Python: Snake-case and does not start with a digit. The technical name also determines what the name of the rule class must be in the code blob. The Technical Name cannot be changed once the rule has been created. - Description: The description of this rule. Will be shown right next to the
Display Nameon all relevant pages. Should contain a concise but clear description of what this rule does. - Pluggable: Deprecated.
- Source Code: The code blob for this rule or the exact phrase
# code is yet to come.. More information on this in rule implementation. - Requirements: Deprecated.
- Parameters: All of the different parameters that this specific rule can take. Each parameter will receive a widget in the flow design it is used in, to allow for easy configuring of the rule for that particular flow design.
As there are many different types of parameters a rule can take, below we describe each of them.
Rule parameters
The following are all the rule parameter types that we can configure within the platform:
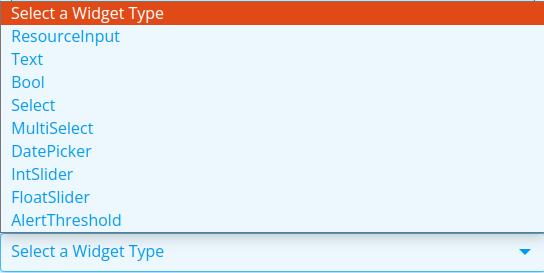
All of these rule parameter types except for the last one (AlertThreshold) serve as an interface for setting the value that must be given to a specified argument in the rule code blob itself.
Let us quickly go over each and discuss what they are for:
- ResourceInput: Tells the platform that the values given will be identifiers of resources, usually comma-separated. The type of resource can be set with the
Resource Typefield. This will create a widget where you can browse this resource type. Tip: The ewx-cli tool has support for this parameter type and knows to expect IDs referring to other resources when encountering it. It is therefore recommended to always use this parameter type when a rule takes resource IDs. - Text: Takes a text string. The value for this parameter is always provided as a string to the rule code blob, no matter if its
Value Typeis set to something that isn’t string.Value Typeonly influences what string contents can be provided. - Bool: Boolean.
- Select: Allows for a list of selectable string values to be preset for this parameter, from which one can be picked set in a flow design. A great way to limit the options that the user has.
- MultiSelect: Similar to
Select, but multiple values can be selected. Making it non-optional will require at least one to be selected. They are provided as a list of strings to the rule code blob. - DatePicker: Creates a widget where the user can pick a specific date and time, also allowing for the timezone to be set. However, keep in mind that whatever value is set for this parameter type, it will always be provided as a string to the rule code blob (thus, you have to convert it back to a timestamp with
pd.Timestampif you want to use it as one). - IntSlider: Creates a slider widget where one can pick any integer between two given values. Great for when a parameter should only take values within a range. Provides its value as an integer to the rule code blob. However, if the range should be unlimited, it is better to use the
Texttype instead and convert a given value back to an integer withast.literal_evalin the rule code blob. - FloatSlider: Similar to
IntSliderbut for floats. Also with the same note. - AlertThreshold: The only rule parameter type that will NOT provide any value to the rule code blob. Instead, this widget is in charge of setting a limit on the number of annotations must be generated by this specific rule before the creation of a task should be triggered. This parameter type should ALWAYS be used when creating a rule that can generate annotations, like validation rules.
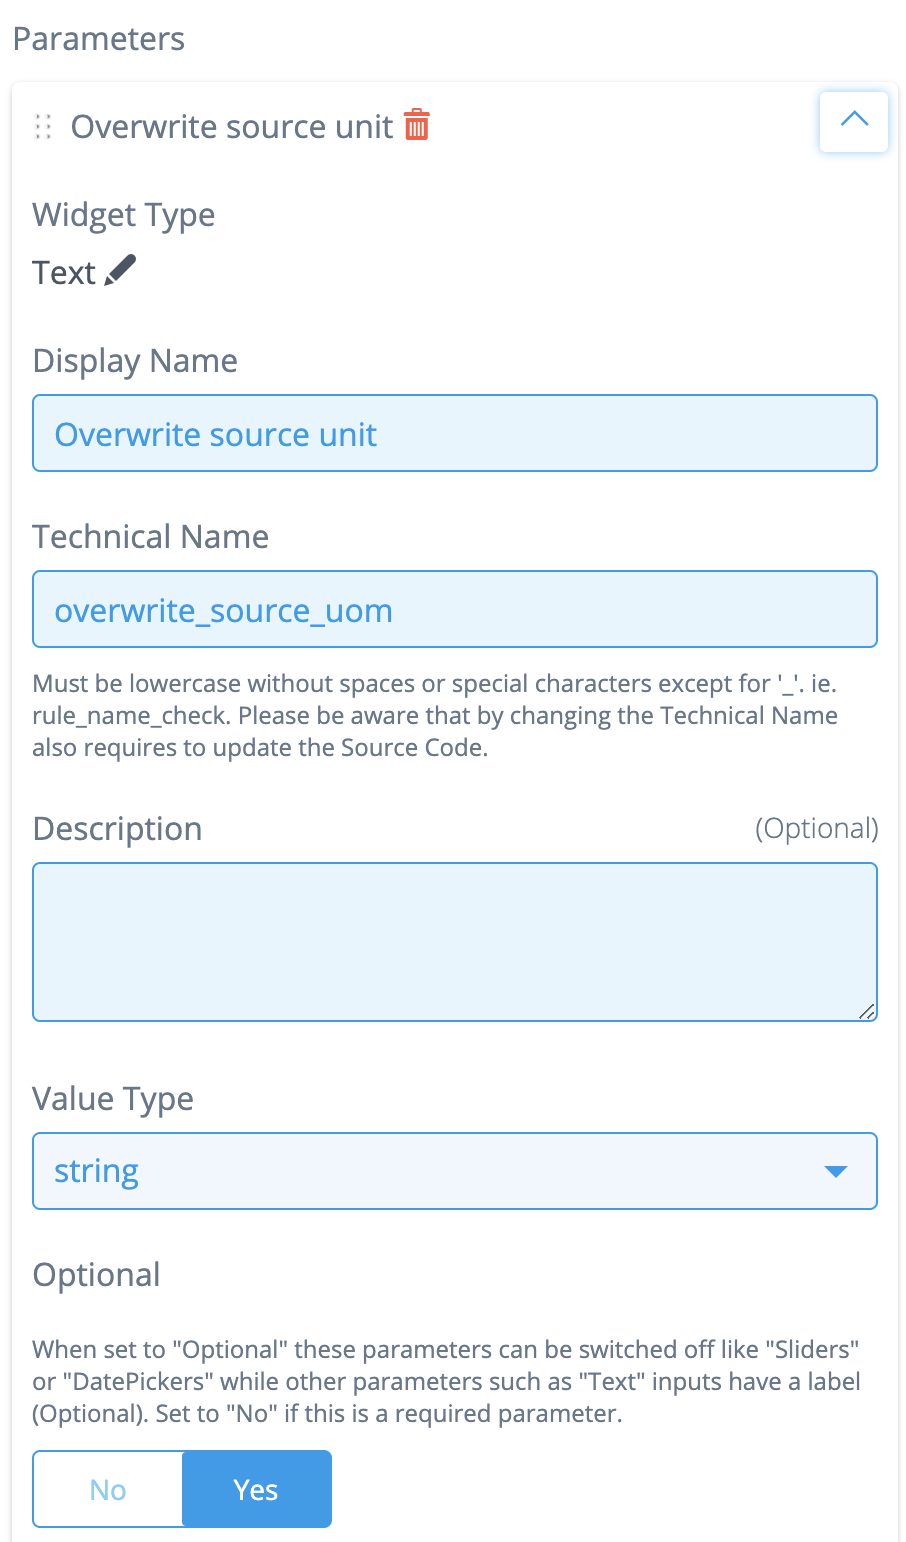
When selecting a parameter type, you will get a menu that looks something like the following (this one is specific for Text):
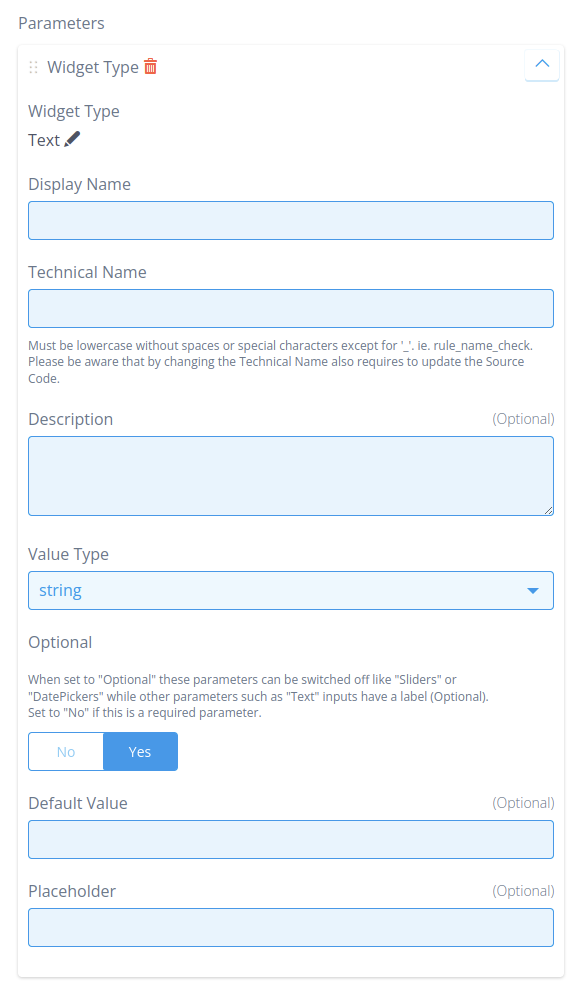
Let’s go over the general fields here as well:
- Display Name: The name of this parameter as shown in the front-end and within flows. Similar to the display name of the rule configuration itself, make sure this is an easy to interpret name.
- Technical Name: The name that this parameter will have within the rule code blob and thus it must conform to the limitations of Python variable naming. An additional requirement is that you cannot use digits in this technical name.
- Description: The description of this rule parameter. Will be shown right above the parameter value field on all relevant pages. Should contain a concise but clear description of what this rule parameter is for and what values it takes. If this parameter is optional, the description should preferably also say what happens if the parameter is not given.
- Optional: Whether this rule parameter is optional or not. If set to ‘Yes’, then there will either be a toggle in the front-end for turning this parameter on/off or in some cases the parameter field can be left empty (like for text).
- Default Value: The default value of this rule parameter. Will be put in as the starting value even if the rule parameter is NOT set to be optional.
- Placeholder: The value shown for this rule parameter if nothing has been filled in. It serves as an example of how to structure the value of this rule parameter, but does not count as a provided value.
Then, depending on the rule parameter type, there may be some additional fields that are specific to that type (like Value Type for the Text type; or the Step; Minimum Value; Maximum Value fields for the IntSlider and FloatSlider types).
Edit an existing rule
The Rules and Algorithms page enables you to search for a specific rule, view its source code, and make adjustments if necessary.
- Go to [Flow Management → Rules & Algorithms].
- Use the dropdown menu or the search field to narrow down your search.
- Click the [Details] button of the Rule you’re looking for. A pane will appear on the right side of the screen, displaying Details and a Parameters section.
- Click the [View Source] button. The Rule Source Code page will open in a new window.
- Click [Edit] in case you need to make any changes.
For editing an already existing Parameter, simply click the Expand icon next to the Parameter name. Make any changes you need and click [Save] when you’re done. Changing the Parameter changes the algorithm, and therefore it impacts the way our platform processes your data.
Continue with the following steps for adding new Parameters to a rule.
- Scroll down to the [Select a Widget Type] dropdown-menu at the bottom of the page, and select a Type (Datasource, Flowconfig, etc.).
- Click the [Add Parameter] button, which is no longer greyed out now. A new section appears that allows you to set up the Parameter.
- Fill in the Display Name and Technical Name fields (these are always mandatory, and the Technical Name needs to be unique).
Depending on the Widget Type, other types of fields and toggles are applicable (mandatory and optional). Please note that before filling in the Display Name field, the new Parameter’s name is Widget Type by default. This changes as soon as you fill in the Display Name.
Creating new Rules for your namespace can only be executed by users with the Rule Owner permission. Click the Identity Access Management hyperlink for more information on how to manage permissions.
